Servicing Michigan's Lower Peninsula & Greater Toledo
Servicing Michigan's Lower Peninsula & Greater Toledo
There are quite a few things you should know when it comes to the basics of home insulation.

Things we will cover in this section include:
Let’s get started and learn some of the basics.
Home insulation is defined as a material that is used to insulate a building. That really just means home insulation is a material that is used to reduce heat loss or heat gain by providing a barrier between the inside of the house and those drastically different temperatures outside.
The three major types of home insulation are fiberglass, cellulose, and foam.
Fiberglass can be either batts and rolls or even a blown-in material. It really comes down to where it is being installed.
Cellulose insulation can be either loose-fill or blown-in depending on where you plan to install it.
Foam insulation can be either sprayed into an open cavity or injected into enclosed exterior walls. Spray foam can also be either open cell – which is light and pliable – or closed cell – which is much denser.
When you are dealing with different seasons of the year, you want your home insulation to maintain a constant temperature without your furnace or air conditioner working overtime.
Keeping your HVAC system from doing double duty will help also help reduce your monthly energy bills.
When considering different types of home insulation, it’s important to understand how it will impact the conduction – heat transfer – and the convection – airflow – which plays a significant role in your home’s comfort and energy efficiency.
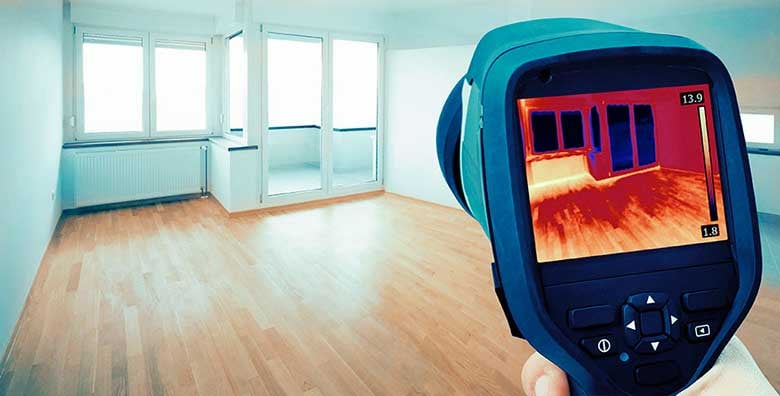
Air leakage through gaps and holes in walls, the attic, crawl space, rim joist, doors, windows, and electrical outlets are a major problem in many homes. This air leakage contributes to energy loss and discomfort.
Proper insulation that creates an air seal will plug up these gaps and cracks.
There are many benefits to insulating your home, some that might not have even occurred to you.
First and foremost, the biggest home insulation benefits you will see are an increase in comfort and saving money on monthly energy bills.
Improving your home’s insulation will increase the comfort your family feels. No more worrying about those pesky drafts, rooms that can’t maintain a constant temperature, or high heating and cooling bills.
A majority of homes across the country have inadequate insulation, which has led to significant air leaks. All of those air leaks combined in a typical home’s envelope – the exterior walls, windows, doors, crawl space, attic, and rim joist – would be the equivalent of leaving a window open year-round.
That’s a lot of wasted energy you can avoid coupled with the right insulation that creates an air barrier. So how can home insulation save money? Insulation will reduce the air leakage you’re experiencing, which can save you money on your monthly energy bills, and you really can’t put a price on that added comfort.
Some of the added benefits of adding an air barrier in your home include:
The air barrier the insulation creates really depends on the material. Traditional insulation like fiberglass and cellulose will stop some air movement but still allows for some air to move through it. Foam insulation creates a complete air seal, which will stop those air leaks in your home.
Now that you know the benefits, let’s talk about how long that insulation is going to last.
Not only does all insulation perform differently, but each materials’ lifespan is also different.
The length of time that home insulation lasts also varies based on factors in the home. For example, if you have a water leak that comes into contact with traditional insulation, then that drastically changes the materials’ life expectancy. While this kind of leak can cause a problem for fiberglass and cellulose, it doesn’t affect how most brands of foam insulation performs.
While some sources on the Internet may state that fiberglass and cellulose can last for more than 80 years, it doesn’t include any information about how these materials will sag, settle, and shift in as little as 15 years or less.
On the flip side, foam insulation will never sag, shift, or settle and will last the lifetime of your home.
 There are several factors that come into play that indicate it is time to replace your current insulation.
Most homes have either fiberglass or cellulose, so we’ve already discussed how those materials are known to deteriorate over time. This deterioration leads to problems like high energy bills, uncomfortable rooms, and moisture issues.
If you have high monthly energy bills, then you likely have an air leak somewhere in your home due to poor insulation. That air leak is costing you money each month. Fiberglass and cellulose already allow for air movement not only into your home but out of your home as well. Also, keep in mind that cellulose needs to be constantly maintained to ensure coverage and fiberglass will break down over time.
Your monthly energy bills are skyrocketing because your furnace and AC unit are working overtime to maintain a constant temperature. Those cold floors and drafty walls are what is contributing to the comfort of your home.
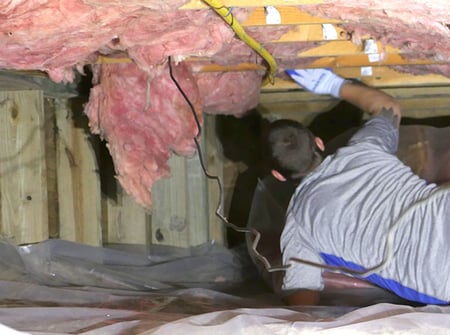
For example, if your floors are cold, go look at the insulation in your crawl space. If it’s sagging, wet, or black, then you aren’t getting the insulation coverage you need to keep the cold air from seeping into your home.
There’s no easy way to look inside your walls to check the insulation, but your hands can work like your eyes. Do your walls feel cold to the touch? Are the dishes in your kitchen cabinets cold? Do you feel cold drafts in your home like a door has been left open, but they are all closed? Those are all indicators that you need insulation in your exterior walls.
Another reason your home may be getting cold during the winter comes down to science – heat rises. The air you pay to heat moves right through your ceiling, into the attic, and right through the roof.
It’s important to look in your attic to see what the insulation looks like. Is it shifted to one side? Does it not look quite as fluffy as it once did? Does it look like mold has taken hold or animals are nesting in it? These are all signs your attic insulation is on its last legs.
If the insulation in your attic has sagged or shifted, it’s time for an upgrade. You can either add more of the traditional insulation or create an air seal with spray foam.
Moisture in your home will lead to mold and mildew growth, especially if the insulation you currently have holds that moisture in place.
The most common places you can find moisture will be in the attic due to possible roof leaks and in your crawl space because it is a cold, dark place. You can also get moisture in your walls when cold temperatures meet warm temperatures in the wall cavity.
If your insulation looks wet, is sagging, or has visible mold in it, then the moisture has already done damage and it will need to be replaced. For example, when fiberglass and cellulose get wet, they both lose their insulating properties.
When you replace your old insulation, choose a material that doesn’t retain water and also doesn’t promote mold and mildew growth.
RELATED: 18 Signs and Symptoms it May Be Time to Update Your Insulation
For optimal energy efficiency, your home should be properly insulated from the top all the way to the bottom, according to the U.S. Department of Energy.
Maybe you aren’t in the market to insulate your home from top to bottom, so let’s talk about the best places to insulate your home that will give you the best results. If your home has some insulation, but areas like the attic, walls, or crawl space are lacking, you’ll need to pick up the slack.
As we said, insulating your entire home will get you the most benefits, but each area has its own set of advantages.
Little to no insulation in your attic will allow all the air you pay to heat to escape right through your roof. Heat rises, so having poor insulation is just like going out in the winter without a hat.
If you want an energy-efficient home, insulating the attic is a space that will give you a good return on your investment. This will help your treated air from leaking out and your furnace from running constantly. Your furnace not running constantly means saving on your monthly energy bills.
The attic is where to focus on energy efficiency, but what about for comfort?
Little to no insulation in the exterior walls lead to drafts, cold walls, and several other problems. Adding insulation to your walls will reduce that annoying draft that keeps you bundled up at night. Another reason to insulate the walls is that heat rises and if it can’t escape through the attic, it’s going to push out through your walls.
Another area that gets overlooked when it comes to comfort is the crawl space or basement rim joist. Think of all the times you’ve had to walk around your home with socks because the floor was just too cold.
What is happening is that the crawl space is allowing cold outside air into your home and it is moving up through your floors. That cold air moves through the floor, up into your attic. This is called stack effect.
This also happens during the summer months but during any season it is putting extra strain on your AC unit and furnace.
If you have mechanicals in your crawl space, then it’s cooling the warm air down before it even makes it out of your vents.
These are the top areas of your home to look at insulating, but it really depends on the problems you are experiencing. Look at the problems you are experiencing and evaluate which area makes the most sense for your home.
Understanding how to create an air seal and how R-Value works in relation to your insulation project are important.
Here we will break down what R-Value is and why an air seal is important, as well as some helpful tips on the amount of insulation you need and what the building code is.
In your research, you are going to see a lot about R-Value, but don’t let the number fool you as an insulation’s capability to keep your home comfortable is so much more than that.
So, what is R-Value?
R-Value is the capacity of an insulating material’s resistance to heat flow. That means the higher the R-Value, the greater the thermal resistance of the insulation in some cases. While understanding how R-Value works is good to know, it’s not the revered determiner for all things insulation.
R-value only measures a given insulation's ability to stop heat transfer through conduction. A product such as fiberglass or cellulose may achieve a high R-Value but will still allow air to pass through it, thus allowing heat transfer, through way of convection.
So, a home could be insulated with the highest R-Value ratings but still be uncomfortable and have high monthly energy bills because it still allows the outside air to pass through.
R-Values are measured in airtight, zero weather condition capsules. This is not an accurate way to measure something that will be on the outside walls of a house, that will constantly be indirectly exposed to several weather conditions and varying wind speeds. Consumers should know how the insulation will react to water, wind, mold, and sound.
Furthermore, most kinds of insulation lose R-Value when the temperature drops. This is because the material itself gets colder with the temperature. If the material is colder, it will be less effective in stopping heat transfer by conduction. Different types of insulation will differ in how much R-Value they will lose.
Foam insulation does not suffer from this effect -- in fact, it increases in effectiveness when the temperature drops. This is because the cells that makeup foam insulation hold gasses and hinder the foam from getting colder. It is because of this that Styrofoam coolers work so well.
To many, the solution for airflow is to use fiberglass batting that has a vapor barrier on one or both sides. When you use fiberglass with a vapor barrier you need ventilation so that vapor can escape before building up moisture and causing all kinds of damage.
However, if the vents are in place, airflow is present which allows heat transfer through convection. There is just no way to win with fiberglass. Cellulose has all the same weaknesses as fiberglass. Cellulose will settle over time, it does not stop airflow and will require added insulation in later years.
An air seal in your home will prevent the passage of air or vapor.
Creating an air seal with foam insulation can work to block air movement into and out of your home.
The air leakage you are experiencing can account for around 30 percent of a home’s heating and cooling costs, according to the U.S. Department of Energy.
Foam insulation fills all of the nooks and crannies wherever it is installed – the attic, walls, crawl space, and rim joist. This kind of coverage greatly reduces energy loss in your home, which cuts out those high energy bills.
Traditional insulation, like cellulose or fiberglass, can’t create the air seal you’re looking for, at least not without a lot of additional manual air sealing work that many homeowners and even contractors don’t do. The easiest and best solution is having insulation that also acts as a seal -- all-in-one.
For your home to be comfortable there is a minimum amount of insulation you will need to have in each area to achieve this.
Most areas of the house will be different when it comes to the amount of insulation needed to achieve your goals. It’s important to note that if your goal includes creating an air seal, traditional insulation wouldn’t be a good fit for you as it doesn’t have that capability.
So let’s start at the very top and work our way down to the bottom.
The attic of your home is a place where you will lose a lot of your treated air if there isn’t enough insulation.
If you are adding open cell spray foam to your attic, it’s best to insulate the roof deck in most cases to seal off the envelope of your home. In this case, you would want 6- to 10-inches of open cell spray foam to provide an air seal and thermal transfer resistance.
If you add fiberglass or cellulose to the attic floor or roof deck, to get good coverage you will want at least an R-49. The actual inches of the material will depend on each individual product and manufacturer.
The exterior walls of your home is a place where cold air is going to sneak in if you don’t have good insulation coverage.
There isn’t necessarily a number that you need to reach when it comes to those existing walls. The point is to fill the cavity completely with either injection foam or blown-in cellulose.
If you are remodeling or building your new home and the exterior wall cavity is open, then to reach your goal the requirement is slightly different.
If you are having open cell spray foam applied to the wall cavity, you will want a nominal 3-inches to create that air barrier.
For fiberglass in the open wall cavity, you will want to have an R-21. Much like the attic and the rest of the house, the actual thickness is determined by the product and manufacturer.
Cold floors are very annoying and can cause your monthly energy bills to skyrocket as you try to keep your feet warm.
Open cell spray foam in the crawl space can be applied to either the walls or ceiling of the space. For either application, you will want 3-inches to create an air seal. This thickness also applies to the crawl space, rim joist, and basement.
Fiberglass for the crawl space, rim joist, and basement needs to be at least an R-13.
 The International Building Code (IBC) is a model building code developed by the International Code Council.
The IBC has been adopted to use as a base code standard by most jurisdictions in the U.S. because the code addresses both health and safety concerns for buildings based on prescriptive and performance-related requirements.
The building code really comes into play for new build homes and additions. So if you’re insulating your existing home you don’t have to worry about it as much, but some municipalities may still require a permit to upgrade the insulation in your existing home. With that being said, it is always best to check to see if you need to meet any building code requirements.
These code provisions are added every few years to protect public health and safety while avoiding unnecessary cost or preferential treatment over one material or method of construction over another.
It is the standard for most builders to use the IBC and their state’s building code to base how much insulation you need, how it needs to be installed, what types of insulation materials to use in certain areas of the home, and depths.
Each state has its own insulation code that depends on the climate zone. The climate is a very important thing that is taken into account and that’s when contractors look at the code to determine what is required.
Michigan is in climate zone 5 through 7, but let’s talk more about what that means.
Michigan’s building code is vastly different from Florida’s for example, due to the differences in temperature fluctuations, relative humidity, and the temperature outside versus inside.
Michigan also requires more shielding on the home for wind, whereas a state like Arizona doesn’t.
A very general rule of thumb is the colder your state can get, the more R-Value will be required to insulate your home. Michigan, Wisconsin, and Minnesota will have higher insulation building code requirements than let’s say Tennessee.
Meeting code is simple, as it’s just pass or fail. Prescriptive is the best-known way to meet code because some contractors aren’t familiar with the performance method. Performance and prescriptive are both pass or fail based on efficiency and safety, the contractor is just taking a different way to get there.
Performance tends to be more complicated because the contractor must prove certain things like, does the insulation material creates an air seal, does the insulation have an aged R-Value, and different variables. In a nutshell, the contractor is showing the inspector that based on the numbers and test results that the insulation material will perform in an efficient way and will be safe.
It’s important when trying to pass code to check your home’s performance. This can be done by taking all the data, room assemblies, etc., and plug it into a computer program. Those programs include REScheck, HERS Index, and REM/Design.
When it comes to insulating your home, you have several material options to choose from.
Here we will break down the history of insulation, what home insulation is best, as well as a deeper look at each type of material.

When I was a kid I grew up in a farmhouse that was built in the late 1860s.
During renovations, we had to tear down some drywall and what we found in the walls was kind of unexpected. It wasn’t the fiberglass or cellulose you might find in more modern walls, but old newspapers, photos, hay, nails, coffee cans, and a few dolls.
Not really insulation, but the thought was to fill the walls with something. We have insulated houses in the Detroit-area that were built in the mid to late 1800s and found nothing but horsehair in the walls.
It wasn’t until the late 1930s that fiberglass insulation was invented by the Owens Corning Company and installed in homes.
Cellulose is actually one of the earliest types of insulation, but it didn’t become a popular choice for homes until the 1950s.
Both fiberglass and cellulose are what are most commonly found in homes built between 1950 and 1980.
Foam insulation first hit the scene in the 1970s as an alternative to fiberglass or cellulose. It was a material that was easier to use in home construction because of its expanding capabilities. Foam took off as an insulation material commonly used over the past 20 years.
Since its introduction, foam insulation has been improved over the years and is now a top choice for savvy homeowners and builders because of its superior benefits.
Making the decision to add insulation to your home is pretty important, as your choice should be based on your needs.
The most common insulation materials found in existing homes are fiberglass, cellulose, and foam. In this section, we'll break down what each insulation material is, where it's installed, pros and cons, and cost.
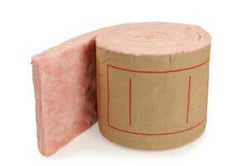 Fiberglass is an insulation material that is found in most homes. It is commonly used in two different forms – blankets, which are batts and rolls, and loose-fill. It is also available as rigid boards and duct insulation.
Manufacturers produce medium- and high-density fiberglass batts that have a slightly higher R-Value than standard batts, according to the U.S. DOE.
Fiberglass insulation can be installed in exposed wall cavities, floors and ceilings, attics, crawl spaces, and rim joists.
As an insulator, fiberglass slows the spread of heat, cold, and sound in structures. The material does this by trapping pockets of air, keeping rooms warm in the winter and cooler in the summer, according to the International Association of Certified Home Inspectors (InterNACHI).
Fiberglass batts are typically stapled into place. Most batts are made with a paper or foil backing that faces the direction of where warmth is coming from.
When installed correctly, fiberglass can create a barrier that will slow the passage of moisture but doesn’t stop it or air movement completely.
Fiberglass insulation has its own set of benefits and problems you should consider before buying it for your home.
Pros:
Cons:
When it comes to the cost of fiberglass, the total price is determined by the size of the area that needs to be insulated, the labor needed, and the cost of installation supplies.
Since every home is different, we will use the average U.S. home size built in the 1970s of about 1,500-square-feet and Owens Corning fiberglass insulation, according to the Home Depot calculator.
These prices are just estimates for the insulation material for a 1,500-square-foot home. These prices don’t include the cost of supplies like fasteners, tape measure, utility knife, dust mask, safety glasses, work gloves, and a straight edge. If a contractor is hired to do the job, there are additional labor charges.
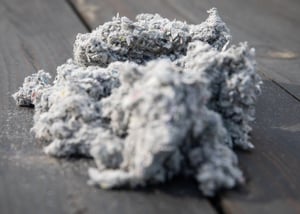 Cellulose is the oldest form of home insulation. It can be either loose-fill or blown-in insulation and used in either existing homes or new builds.
Typically, you will find cellulose in enclosed existing walls, open new walls, and unfinished attic floors. Several companies make cellulose insulation from recycled newsprint.
Cellulose insulation can be used in both existing homes and new construction. It can be blown into attic cavities as loose-fill, dense-packed into walls and floors, or wet sprayed for new construction. It helps increase heat retention and has the potential to dampen noise levels, according to the Energy Audit Blog.
Dense pack cellulose is used more commonly today for retrofitting existing homes. The dense packing into the wall cavities as thermal insulation while providing some level of sound dampening.
Wet spray cellulose has water added to it during the application process. The material has the same thermal and sound retardant properties as dense packing. Wet spray cellulose is almost always installed in new construction before the drywall is put up.
Cellulose insulation comes with its own pros and cons.
Pros:
Cons:
The cost to insulate the attic floor with cellulose varies depending on a few factors. Again, we will be using the cost of a 1,500-square-foot home.
This is just a rough estimate of the cost for these materials from just one cellulose manufacturer. These prices don’t include the cost of other supplies including masks, safety glasses, work gloves, a straight edge, tape measure, utility knife, or fasteners. The cost is higher if you decide to hire a professional insulation contractor.
 If you’re considering foam insulation for your home, you have a few different options.
For your attic, crawl space, rim joist, and basement walls you will use spray foam insulation. Spray foam can be either open cell or closed cell, but in most cases open cell is used in homes while closed cell is better suited to pole barns with exposed walls. Spray foam can also be used in the open walls of a new build home.
RELATED: Open Cell vs Closed Cell Foam Insulation: Which is Better for My Home?
When it comes to enclosed exterior walls, you will be using injection foam insulation.
Spray foam insulation is an insulating material and air barrier that seals open walls, attics, crawl spaces, rim joists, and basements against air movement. This also includes areas around electrical outlets and light fixtures, and where the walls meet the windows and doors.
Unlike traditional insulation, spray foam doesn’t lose its shape and fills all of the nooks and crannies, cracks, gaps, and crevices when it is installed. Open cell spray foam expands 100 times when it is sprayed into a cavity.
Injection foam is also an insulation and air barrier that seals enclosed cavities like existing walls against air movement. It never loses its shape in the cavity and also completely fills the cavity just like spray foam.
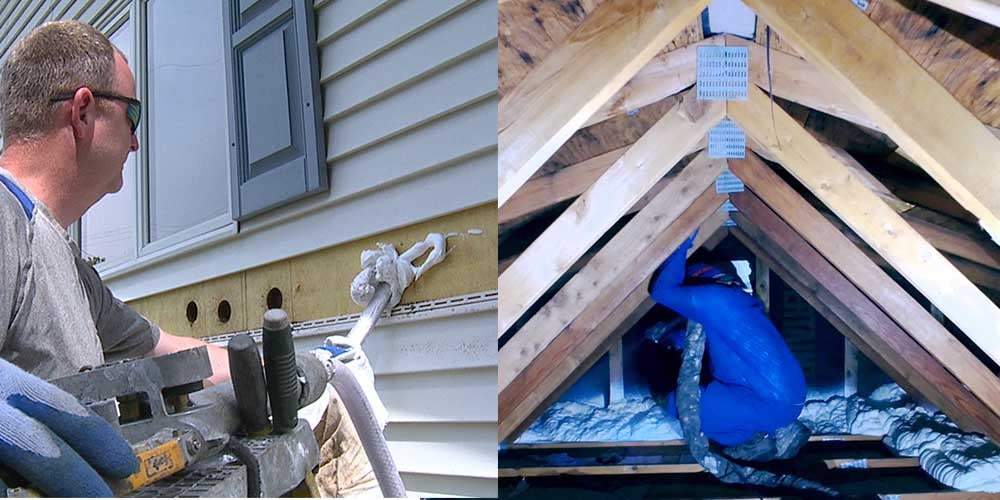
It’s important to note that injection foam can be installed in your exterior walls from the outside. The process varies slightly depending on the type of siding your home has. Vinyl and aluminum siding can be removed and holes are drilled into the stud cavities.
If you have brick siding, a hole is drilled into the mortar in the stud cavity at the top, middle, and bottom. For wood siding, a hole is drilled right into the wood if the siding can’t be removed. That hole is patched with a wooden plug.
Here are some of the pros and cons of spray foam insulation.
Pros:
Cons:
Now let’s look at the pros and cons of injection foam insulation.
Pros:
Cons:
There are many factors that determine the cost of both spray and injection foam insulation. The biggest factor being the area of the home to be insulated.
The factors that determine the cost of spray foam insulation in a new build include the layout of the house, the pitch of the attic, and whether open cell or closed cell spray foam is used.
The same is true for an existing home, except injection foam would be used in the exterior walls.
The cost to insulate a new build home with spray foam that is 2,000- to 2,500-square-feet is between $10,000 and $13,000 from the top of the attic all the way down to the bottom of the basement. The price range for a smaller home around 1,000-square-feet would be between $5,000 and $7,000.
The cost to insulate an existing home with spray foam would cost between $7,000 and $21,000. This would include the attic, crawl space, and rim joist.
Finally, to insulate the existing exterior walls of your home would cost anywhere from $3,000 up to or exceeding $7,000.
Here are some related articles that talk in more detail about insulating a home with foam insulation.
How Much Does Spray Foam Insulation Cost in the Attic of an Existing Home?
How Much Does Insulating a Crawl Space with Spray Foam Cost in an Existing Home?
How Much Does it Cost to Insulate a Rim Joist with Spray Foam?
What is the Cost to Insulate Walls with Foam in an Existing Home?
How Much Does it Cost to Spray Foam a Basement?
Flash and batt is spray foam insulation coupled with fiberglass batts.
It’s a technique used by some insulation contractors where a flash of closed cell spray foam at 1- to 2-inches is applied in an effort to create an air seal and then puts fiberglass batts over it. It’s typically done in exterior walls during a remodel, addition, or when building a new home.
The theory behind this technique is that the layer of closed cell spray foam gives the home an air seal and then the fiberglass adds the R-Value to get to the prescriptive code.
With most closed cell spray foam insulations, you need a minimum of 2-inches to create an air seal. There are some manufacturers that require up to 3-inches to create an air seal.
The 2-inches of closed cell is about an R-14 in the walls and the prescriptive code in Michigan for walls in new construction is R-21. The contractor adds the fiberglass just to hit the prescriptive mark and in an attempt to cut costs.
Although this method is one way to meet code and cut costs, there are problems with this model.
Let’s look at the pros and cons of flash and batt insulation.
Pros:
Cons:
Now how about the cost?
Just like any other insulation project, the cost is determined by the size of the area that needs to be insulated.
The cost to insulate the wall cavities in a 2,000-square-foot home with flash and batt would be between one-third to half the cost of insulating the walls properly with spray foam alone.
What it comes down to is choosing an insulation material that works for you.
To really make the best decision for your home, you should look at the pros and cons of each material and the goals you are looking to accomplish with your budget.
Paying to heat or cool your home can cost you a lot of money if your insulation isn’t up for the challenge.
Just heating and cooling your home accounts for up to 50 to 70 percent of the energy used in the average home, according to the U.S. Department of Energy.
Reducing the air leakage in your home with insulation will make a difference in your heating and cooling bills.
Traditional insulation, like cellulose and fiberglass, are resistant to heat that is transferred through conduction. This means these materials aren’t always more efficient. Fiberglass and cellulose tend to poorly protect against airflow, meaning they contribute to discomfort in your home, as well as energy loss.
Foam insulation is a better fit if your goals are to reduce air leakage and monthly energy bills as it creates both heat resistance and an air seal. It’s also the best fit if you want to make your home more comfortable and you don’t have to worry about frequent maintenance because it doesn’t shift or settle over time.
When it comes to the options for your entire existing home, your options will be fiberglass, cellulose, and spray foam, and injection foam. Let’s take a look at an existing house starting at the top and working our way down to the bottom.
High energy bills and the inability to maintain a constant temperature in your home are just a few of the signs your attic needs new or updated insulation. The best options for the attic are open cell spray foam, fiberglass, and cellulose.
Cellulose is one of the oldest insulation materials used for home insulation. It can be either loose-fill or blown-in and is primarily made of recycled newsprint or denim.
Cellulose insulation in the attic can be a DIY project and is fairly inexpensive when compared to the other options. It’s important to keep in mind that cellulose can settle up to 20 percent, shifts to one side of the attic, and it doesn’t create an air seal. That means cold and hot air can move freely through your attic without any barriers.
Fiberglass is another traditional insulation material that consists of extremely fine glass fibers. This material can also be done as a DIY project by a handy homeowner. The downside of fiberglass though is the fibers can embed in the skin and even be inhaled causing respiratory problems. It is another material that still allows for air movement in the attic.
Open cell spray foam is designed to fill every nook and cranny in your attic as it expands 100 times its original size. Unlike the traditional options, spray foam doesn’t settle or shift and doesn’t promote mold growth or retain water. Spray foam also creates the air seal you want to keep your treated air in and Mother Nature out.
Now let’s look at those walls.
How you insulate your existing walls can be different depending on whether the drywall is up or down. For example, if they are down because this is a new build home or you’re renovating, then your options are different compared to if the drywall is up.
If you have open wall cavities, then your options are fiberglass batts or spray foam.
For your enclosed exterior walls, your options are blown-in cellulose or injection foam insulation. The process for both is similar and can be done outside the home by removing pieces of siding and drilling holes into the stud cavities. The siding is replaced once the job is completed.
Cellulose will still allow for air movement and will settle after time, leaving large gaps without any insulation coverage.
Injection foam insulation completely fills the cavity, creates an air seal, and won’t settle over time.
Let’s move on to the next area of your home.
If you’re tired of dealing with cold floors, then it’s time to update the insulation in your crawl space. Your insulation options for your crawl space are fiberglass and spray foam.
The Building Science Corporation recommends the walls of the crawl space be insulated with a non-water sensitive insulation that will prevent interior air from touching the cold crawl space surfaces. Allowing that interior air that is full of moisture can cause condensation and promote mold and mildew growth.
The crawl space is the area of the home that sees more moisture than other areas of the home.
These facts make fiberglass a poor choice for the crawl space. When fiberglass gets wet, the water accumulates in the pockets of the material and drastically reduces its insulating properties. It also promotes the growth of mold and mildew.
Spray foam is the better choice because it doesn’t retain water and it creates an air seal.
Finally, let’s look at the area of your home that is the most overlooked.
The rim joist can be insulated with either spray foam or fiberglass.
Much like the crawl space, fiberglass isn’t the best option for the rim joist due to mold issues as it holds condensation against the wood, according to Home Construction Improvement.
Spray foam doesn’t retain water, so it doesn’t have the same moisture issues. Fine Home Building recommends only air-impermeable insulation for the rim joist – either spray foam or rigid foam boards.
There are some insulation projects that can be done as a DIY project by an experienced homeowner, while there are others that should be left to the professionals.

When it comes to DIY insulation projects, there are several that you can do on your own if you have experience.
Cellulose and fiberglass can be installed in your attic, crawl space, and rim joist as a DIY project for the experienced homeowner. Blown-in cellulose requires the rental of a machine to install the material. Fiberglass must be cut precisely to fit into the cavities where it is installed or you will be left with gaps and air leakage.
In some cases, for very small projects a DIY spray foam kit, or froth pack, can be done on very small projects. There is the potential to waste money when using froth packs for homeowners who aren’t familiar with how to use one. The biggest problem homeowners find with these kits is the spray gun clogs and once they start spraying, they can’t stop.
RELATED: DIY Spray Foam Insulation Kit Problems
Installing your home insulation yourself will take a lot of time and effort, not to mention blood, sweat, and tears if something goes wrong. Here are the pros and cons of taking on the project yourself.
Pros:
Cons:
Hiring a contractor can be more expensive than doing it yourself, but there are times when calling in the experts will save you a lot of money and heartache in the long-run.
Pros:
Cons:
If you think hiring a contractor is the best option for you, here are some tips to ensure you choose the right one.
Insulating your home is the kind of investment that can pay you back over time with energy savings.
There are a few ways you can pay for your insulation project when it comes to financing, but you could also be eligible for rebates from your energy provider for making energy-efficient updates.

There are homeowners who prefer to finance their projects instead of paying cash.
Some people contact their credit union for a loan, while others turn to other financing options.
There are many energy-efficient financing options available depending on where you live. For example, in Michigan, we also have Michigan Saves. They offer convenient low-interest loans for qualifying energy-efficient home updates, including insulation.
Another option homeowners can look into are rebates from their energy provider.
A good contractor will know what rebates are available to you based on the energy provider you have. They will also fill out the paperwork and submit the paperwork for you.
Those rebates can be between $50 to $300 per area insulated depending on your energy provider. Higher rebates are offered in some cases -- between $250 and $1,200 -- for homeowners who create an air seal in their home.
In more cases, rebates take about 4- to 6-weeks to process.
In previous years, taxpayers who make qualified energy efficiency improvements to their home, including insulation, were eligible for federal tax credits up to $500.
While this credit hasn’t been available for more than a year, it’s a good idea to consult your tax professional to see if your insulation project qualifies for another city, state, or federal energy efficiency tax credit.
You have questions and we have the answers.
Here are some of the most popular questions we are asked with a quick answer for you.

Just like any other room in your house, the best way to insulate the bonus room above the garage is to create an air seal in the exterior walls, the ceiling or attic, and the floor.
The options available to you are fiberglass batts, blown-in cellulose, injection cellulose, injection foam, and spray foam. The material you choose will depend on your expectations for the space.
The options for insulating concrete block walls include spray foam insulation, injection foam insulation, polystyrene beads, foam boards, and mineral loose-fill.
While these are your options, the material available for your project will depend on whether the walls will be covered, or the open top is exposed, like in a remodel or new build. To minimize air leakage and possible moisture issues, a material, like foam insulation that creates an air seal, is the best option for this project.
The quick answer is – no you can’t.
The first thought when it comes to stopping air leaks and movement into your home is to add insulation.
Your chimney is a place in your home that gets really hot. With that being said, a chimney must be able to radiate the heat it generates. Spray foam insulation or injection foam in the chase would prevent this from happening and cause problems in the future because the foam will act as a barrier. The same goes for cellulose or fiberglass.
What about traditional insulation materials like fiberglass or cellulose?
You run into the same problem, as well as keeping flammable materials away from the heat the fireplace and chimney produces.
When insulating your existing home, no matter the age, the main options will be foam, fiberglass, or cellulose.
The best insulation for an older home that has a lot of drafts is going to be a material that creates an air seal. Spray foam and injection foam are the best options when it comes to making your home energy efficient and comfortable.
Traditional insulation won’t give you the needed air barrier you need to keep your treated air inside and the outside temperatures out where they belong.
RELATED: Foam vs Fiberglass vs Cellulose: Which Insulation is Best for My Existing House?
We hope you found this resource on home insulation helpful as you decide on the best options for your home and family.
Do you have more questions about insulating your home?
Check out the Learning Center on our website where you will find blog articles and videos that will answer all of your home insulation questions.
 Amanda previously has worked as a breaking news and crime reporter, TV news producer, and editor in Flint and Detroit. Throughout her career as a journalist, she has won several awards from the Detroit Chapter of Society of Professional Journalists and the Michigan Press Association. As part of the RetroFoam of Michigan family, Amanda uses her experience as a journalist to write content that will help educate homeowners on the benefits of foam insulation. When Amanda isn’t writing, she’s spending time with her husband and rescued huskies. She also loves knitting, making art, cooking, and hosting dinner and a movie night for friends and family.